


Setting Up System Programs
|
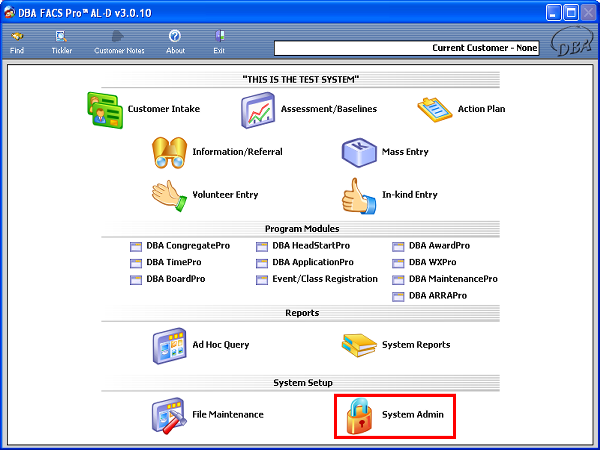
From the main menu click on System Admin. |
|
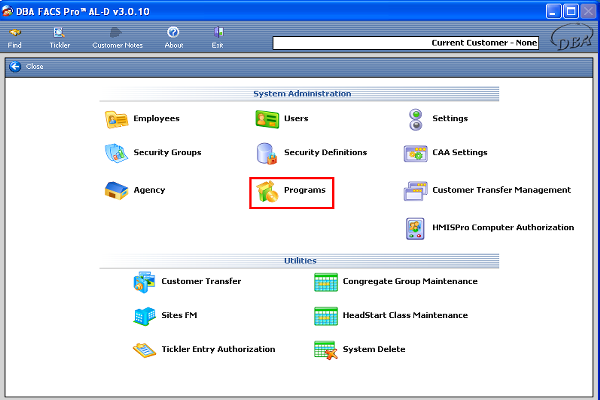
Click on Programs. |
|
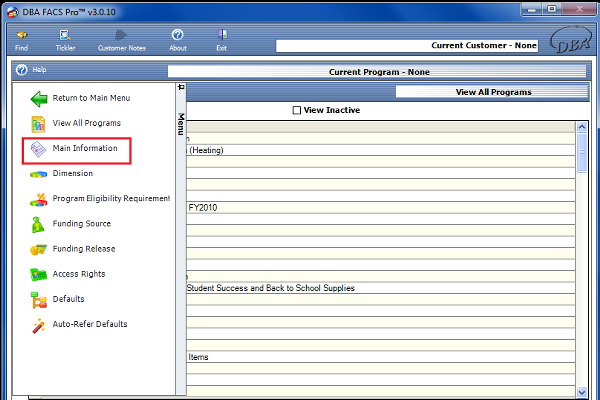
Open the side menu and click on Main Information. |
|
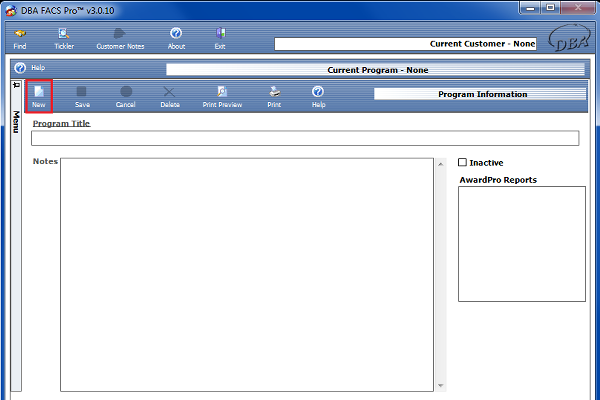
Click on New. |
|
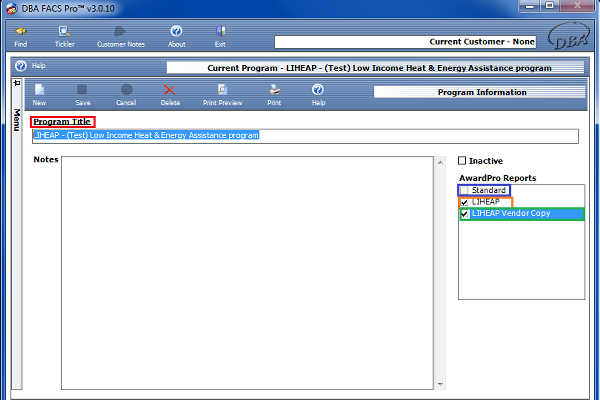
Type in the Program Title. Do Not Check Inactive. If this box is checked, the program will no longer show up. Select which reports (applications) are needed when an award is printed. If a vendor copy and record copy are needed, select LIHEAP and LIHEAP Vendor copy. If just a standard copy is needed, click on standard. |
|
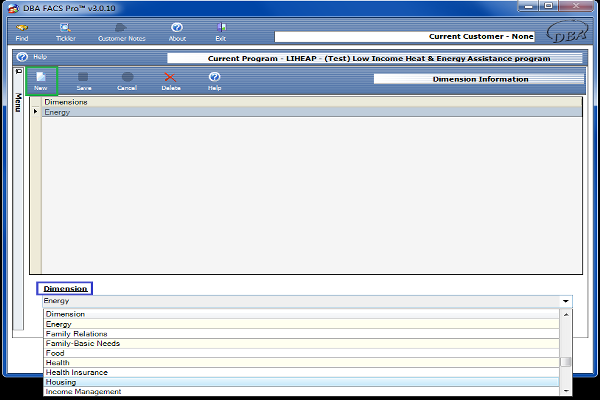
Open the side menu and click Dimension (comes into play with linkages). Click on New. Use the drop down box at the bottom of the page to select the best dimension for the program you are creating. You can create as many dimensions as needed. |
|
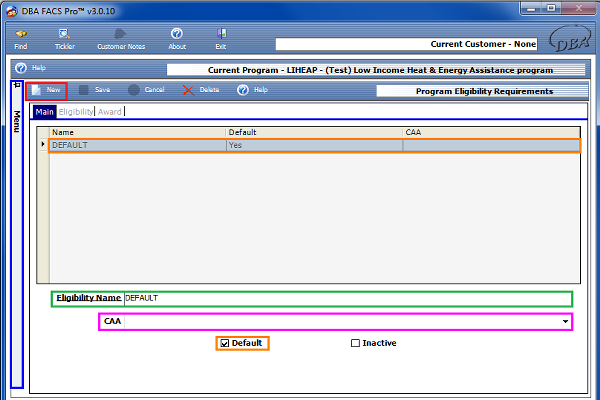
After accessing the Side Menu and clicking Program Eligibility Requirements, click the New button. Type in the Eligibility Name. If there is a single eligibility; it is usually given Default as the name. Can add separate eligibilities if needed by different agencies. If given Default as the name, check the Default box. The CAA drop down box should be left blank if being used for more than one CAA. If for a particular CAA then Select that agency’s name. |
|
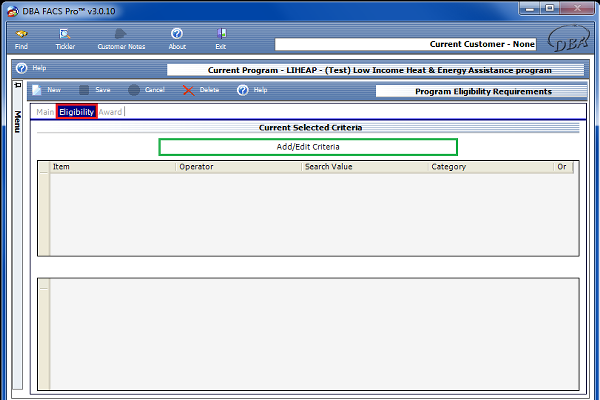
Click on the Eligibility tab. Click Add/Edit Criteria. |
|
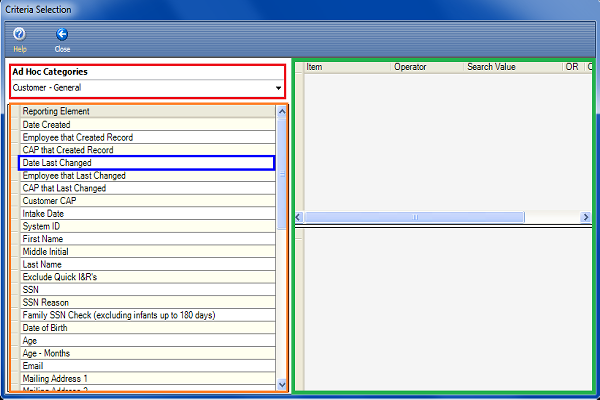
Select the Ad Hoc Category that is needed. According to the Ad Hoc Category, certain field selections will appear. Double-click on a field selection and fill in the information in the new screen that pops up. The search criteria will appear to the right of the screen. |
|
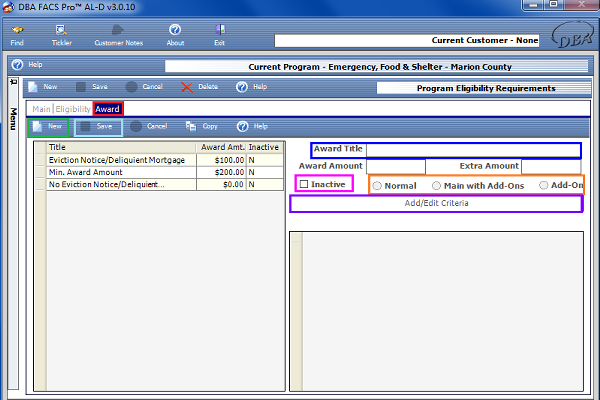
Click on the Award tab. Click New. Type in the Award Title (Should be recognizable) Click on the button which describes the customer's situation (normal – can only get once; main with add-on s – Can achieve more than one, such as with South Carolina where they can get assistance if disabled and again if they are also elderly). Clicking on Inactive would make this not achievable. Click the Save and then click on Add/Edit Criteria. |
|
Select the Ad Hoc Category that is needed. According to the Ad Hoc Category, certain field selections will appear. Double-click on a field selection and fill in the information in the new screen that pops up. The search criteria will appear to the right of the screen. |
|
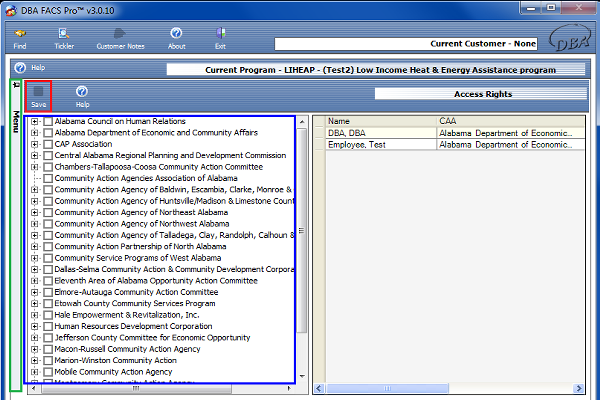
Click on the Access Rights tab from the side menu. Select the individuals who will have rights to this program. They will appear on the right side of the screen. Click the Save. |
|
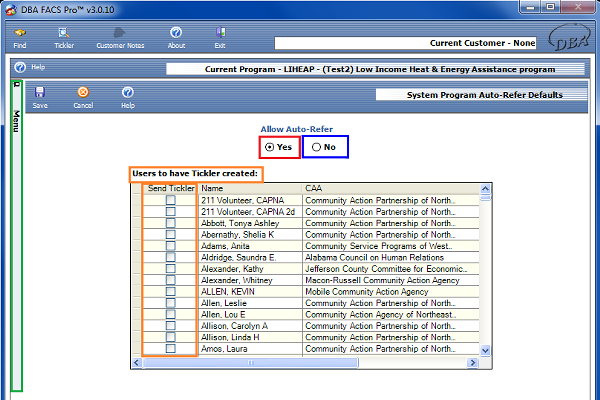
Click on the Auto-Refer Defaults tab from the side menu. Choose Yes to allow Customers to be enrolled into the Program through the Program Calculator, otherwise (No) they will have to be enrolled manually (If not showing up in the Program Calculator, check this section to make sure Yes is selected). If a box is checked off next to a user under the “users to have tickler created”, this means that when a client from that person’s agency is enrolled in this program, then a Tickler will be sent to this person letting them know that the client has been referred to this program. |
|
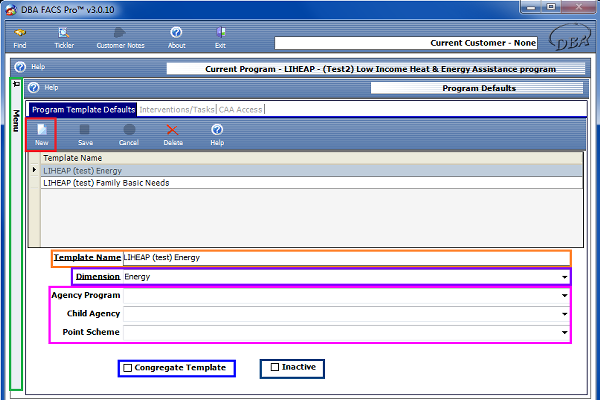
Click on the Defaults tab from the side menu. Click on New. Type in the Template Name (This will be the name that shows up when choosing program). Select the appropriate Dimension from the drop down box. Agency program, child agency and point scheme (used for WX) will be left blank. If Congregate Template is checked off, it will allow for the program to be used in congregate pro. If Inactive is checked it will no longer appear. |
|
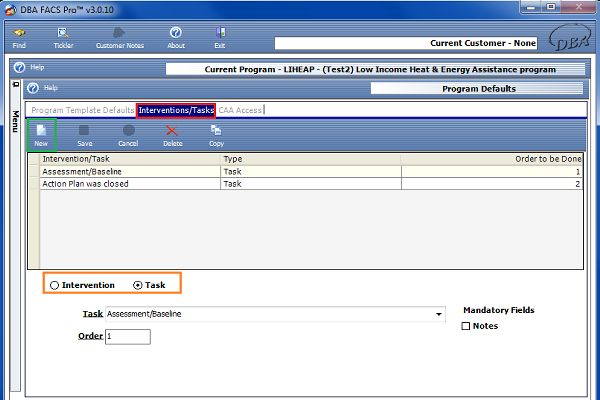
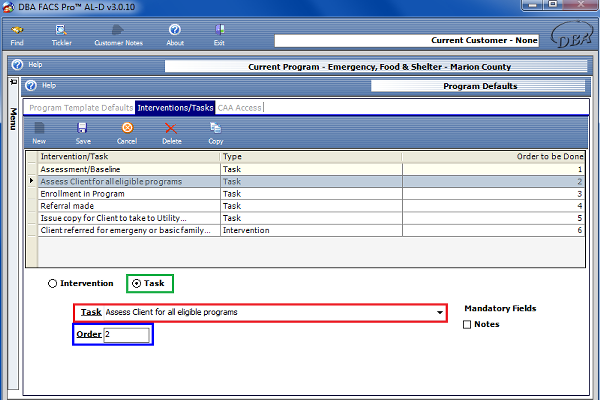
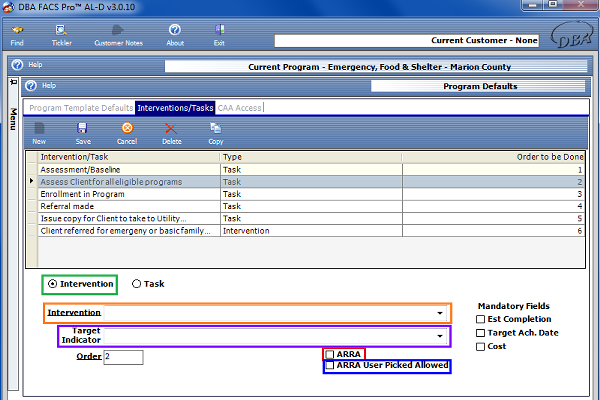
Click on the interventions/tasks tab. Click on New. Click either intervention or task, whichever one you want to add. Each item that is added here will automatically be added to the Action Plan that is created when a Customer is entered into a program using this Template. |
|
When you click on task, a drop down box will appear next to task. Select the appropriate task for the program. When you place a number in the order box, this means the order it will appear in the above box. |
|
When you click on intervention, a drop down box will appear next to intervention. Select the appropriate intervention for the program. (Linkage will have to be done before intervention list will fill up) you can ignore target indicator. There is a check box for ARRA and ARRA user picked allowed. If ARRA is checked off then this will show as an ARRA program once the Action Plan is created. If ARRA user picked allowed is checked off then it gives the user the ability to choose if it is ARRA or not ARRA.
If Congregate Template was selected on the first tab then this Intervention can be selected as a Congregate Intervention so that it gets updated in the Action Plan when attendance is created in CongregatePro |
|
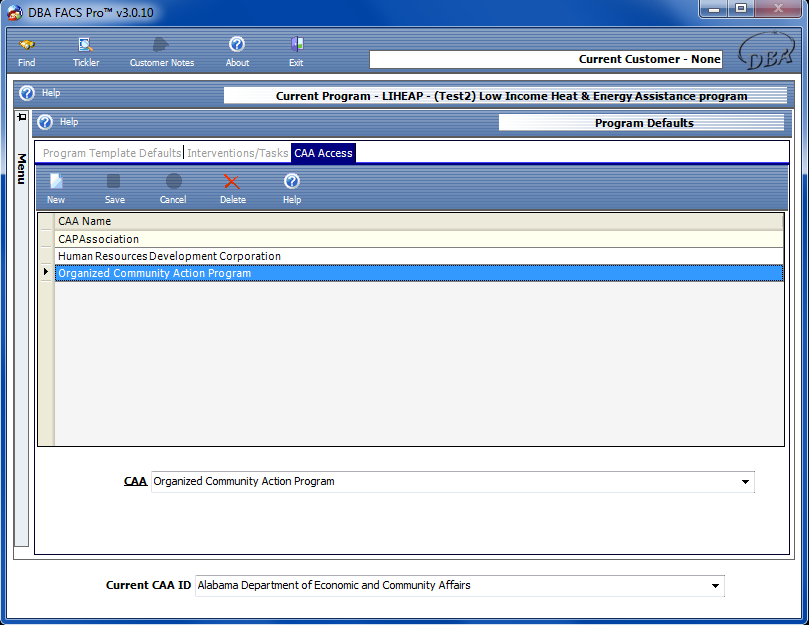
This tab can be ignored. Do not put anything here; it is now left open for all agencies. |